Showing posts with label breakfast. Show all posts

Wednesday, November 11, 2015

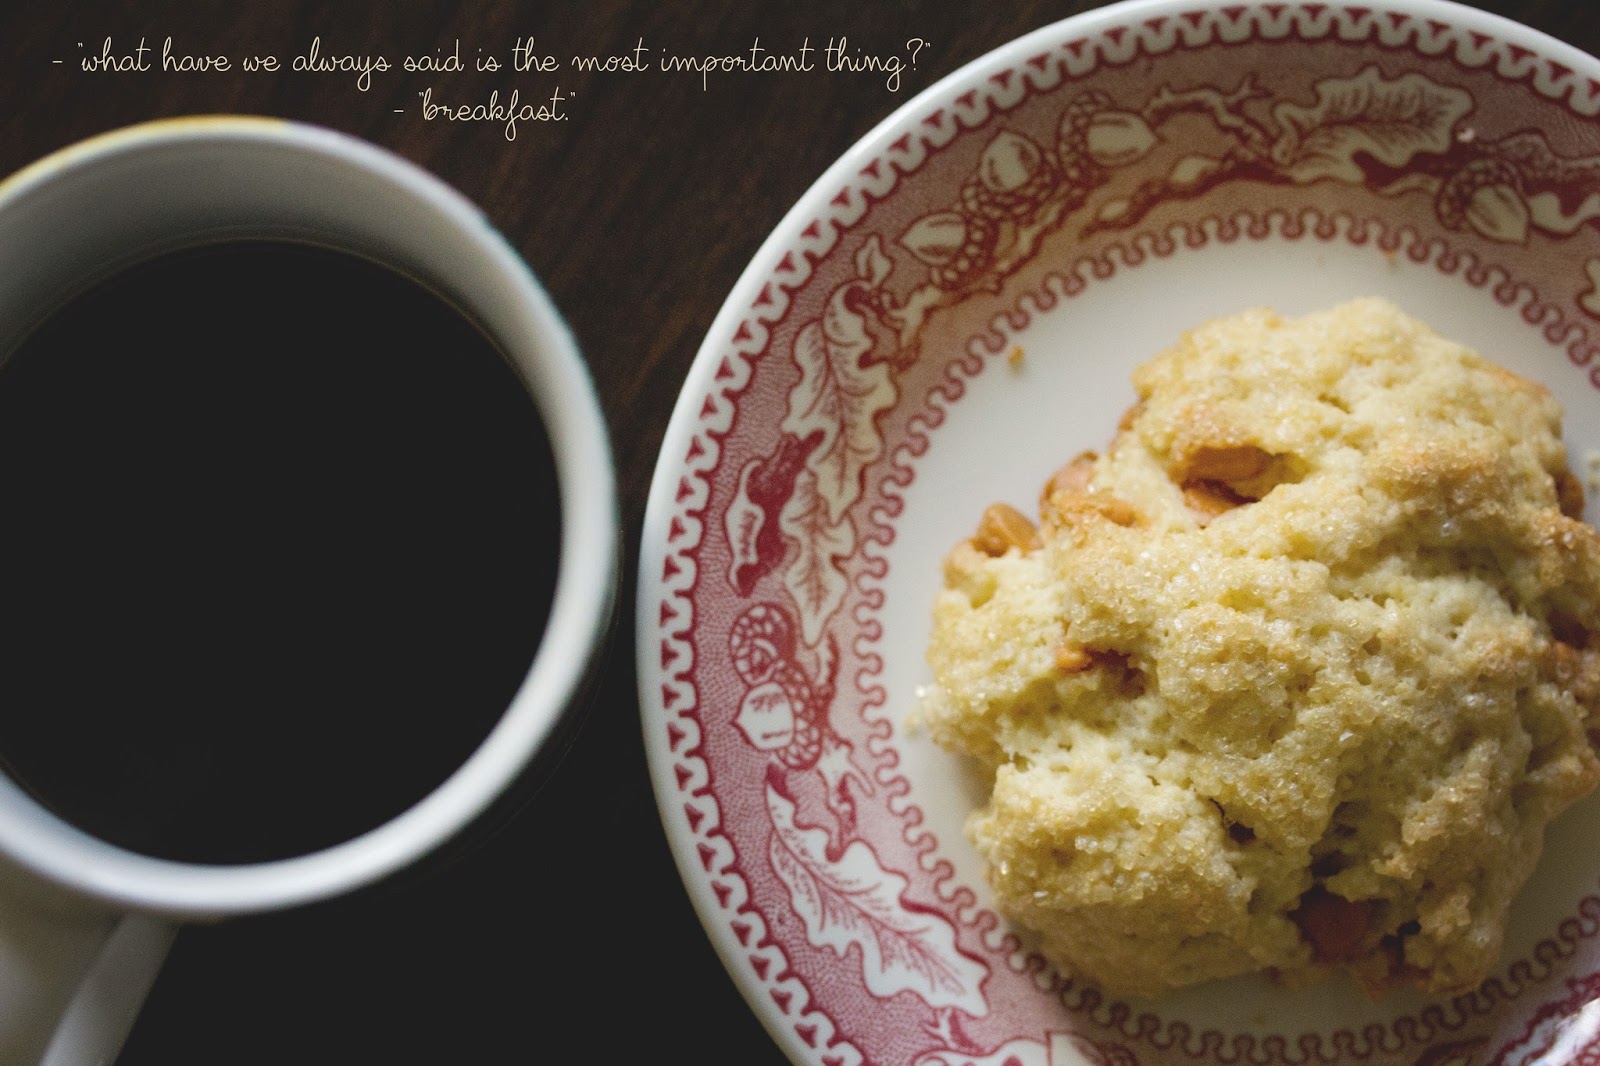
Butterscotch Scones


Every Saturday, almost without fail, I will wake up and immediately I hear, "what are you making for breakfast?"

Although the thought of leaving a cozy bed sounds miserable in the moment, a tasty breakfast usually is motivation enough for me to get up.  And if not, I find that the hope and promise of freshly ground coffee being made for me in return for making breakfast is also a powerful motivator for me.


Scones are a staple in our house and I love that this recipe is so versatile.  Feel free to swap out butterscotch chips for chocolate, fruit, nuts, or whatever your little heart desires. 

Don't forget to eat your breakfast! 

Butterscotch Scones
Ingredients:
2 cups flour
1/3 cup +1 tsp sugar
1 tsp. baking powder
1/4 tsp. baking soda
1/2 tsp salt
1 large egg
1 stick unsalted butter (frozen or very cold)
1 large egg
1/2 cup vanilla Greek yogurt (or plain)
1/2 cup butterscotch chips
Milk & Raw sugar for topping

Directions:
Preheat oven to 400 F.

Mix flour, sugar, baking soda, baking powder, & salt in bowl of stand up mixer or large bowl.

Cut butter into the mixture, mixing it so it until it resemble pea size crumbly bits (how is that for technical?).  Add the egg.  Add the yogurt, mixing into large clumps of dough.  Add the butterscotch chips.

Form a large ball with the dough using your hands.  Form into small clumps and place on parchment lined baking sheet.  Brush tops of scones with milk or cream.  Place raw sugar in bowl and dip the top of the wet scones into the sugar to form a sugar-crusted top.  Place back on baking sheet and bake for 15-17 minutes or until light-golden brown.  Cool for 5 minutes and serve.

Friday, March 06, 2015

Coconut Milk Breakfast Quinoa


Here is a quick & easy breakfast idea that can be made the night before and lasts for a few days if you are eating it in individual servings each morning.  I warmed it up just like oatmeal in the morning and then topped it with fruit, nuts, and maple syrup.  Plus it's super filling and packed with protein - so hopefully it will tie you over until lunch! Feel free to adjust with different types of fruit and nuts - make it your own! :)

Coconut Milk Breakfast Quinoa
Ingredients: 

  • 1/2 cup dry quinoa, rinsed
  • 3/4 cup canned coconut milk + more for drizzling
  • 2 teaspoons vanilla extract
  • 1/2 teaspoon cinnamon + more for sprinkling
  • pinch of salt
  • 1 banana, chopped (or any berry or fruit of choice)
  • 1/3 cup pecans, chopped (or almonds or nut of choice)
  • Maple syrup, for drizzling

Directions: 
Combine quinoa, coconut milk, cinnamon and vanilla in a small saucepan and bring to a boil. Reduce to a simmer, cover, and let cook for 15 minutes until quinoa can be fluffed with a fork.

Divide quinoa into individual servings, then cover with bananas, pecans, and a few extra drizzles of coconut milk and maple syrup.  

You could also substitute almond milk for drizzling or boiling the quinoa in, but you may need to adjust the amount and it will definitely change the flavor. 

 Recipe adapted from How Sweet Eats

Sunday, March 01, 2015

Brioche & French Toast

I've never been great at making french toast...but then I got to thinking, maybe it's the bread's fault.  I don't mean to blame the bread entirely, but, I am going to.  Brioche is definitely a better fit for french toast than my typical 100% whole wheat sandwich bread.  Unfortunately, it's also kind of a pain to make - so if you prefer the easy route, you could certainly purchase a loaf of brioche or other type of light, airy bread for your french toast.

This recipe is not hard - it just requires time and patience - both of which I do not always have.  You will need to start this the night before you intend to bake it.  If you want to make it into french toast the next day, you'll want to get up a few hours before you intend to eat so you have time for the 2nd rise and bake time.

Even though I will probably not make this a weekly staple, it does make two loaves which is nice so you can freeze one for later - and if you want something special for guests or a weekend brunch, it is worth the time because it is delicious! :)

Brioche Bread

Ingredients:
5 tablespoons lukewarm whole milk
1/2 ounce instant yeast
1 pound 2 ounces all-purpose flour
1 tablespoon sea salt
6 large eggs
1 1/2 cups (3 sticks) unsalted butter, slightly softened, plus more for pans
1/4 cup superfine sugar (you can use a food processor to make regular sugar superfine)
1 large egg yolk
1 tablespoon milk

Directions:
Place the milk and yeast in a small bowl; stir to dissolve.

Place the flour, salt, and eggs in the bowl of an electric mixer fitted with the dough hook attachment; add yeast mixture and mix on low speed to combine and knead, about 5 minutes. Scrape down sides of bowl with a spatula; knead on medium speed until smooth and elastic, about 10 minutes.
In a large bowl, mix together butter and sugar. Add a few small pieces of butter mixture to dough; with the mixer on low, add remaining butter mixture, a little bit at a time. When all the butter mixture has been added, increase speed and continue mixing until smooth, shiny, somewhat comes away from the sides of the bowl, and is elastic, 8 to 10 minutes.  It will be super sticky and not form a solid ball of dough – that’s okay – that’s how it’s supposed to be.  Fear not!

Butter a large bowl, transfer dough to prepared bowl, and cover with plastic wrap; let stand in a warm place until doubled in volume about 2 hours.  Since it’s freezing here in the winter and our house is not very warm, I like to pre-heat the oven to 200 degrees, then turn off and place the bowl of dough in the warm oven for the 2 hours.

Lift dough from bowl and drop back into bowl to deflate; repeat process once or twice. Cover bowl and transfer to refrigerator to chill for at least 8 hours and up to overnight.

Butter two loaf pans and divide dough into 2 equal pieces. Divide each piece of dough into 8 equal pieces; form each piece into a ball. Place 8 balls of dough in each loaf pan, side-by-side.


In a small bowl, whisk together egg yolk and milk. Brush dough with egg yolk mixture, reserving remaining. Spray two pieces of plastic wrap with nonstick cooking spray; cover dough in both pans, cooking spray-side down and let stand in a warm place until doubled in volume, 1 1/2 to 2 hours.
Preheat oven to 425 degrees.

Brush each loaf very lightly with reserved egg yolk mixture. Transfer pans to oven and bake until brioche just begins to turn golden, about 15 minutes. Reduce temperature to 375 degrees conventional oven and continue baking until deep golden brown.  Remove from oven and let brioche cool in pans for 5 minutes. Remove from pans and place onto a wire rack and let cool completely.  Be careful – the bread is delicate.  If you will not be using both loaves right away, you can freeze one by wrapping it in tin foil and sealing it in a large Ziploc bag.
Brioche is great for many things but my favorite way to use it is by making French toast.  It’s also great for grilled cheese, burger buns, dinner rolls, and peanut butter banana toast.

If you’re looking for a tasty French toast recipe – you can check out the one below that some friends made for us.  I instantly fell in love with it and knew I would need to make it at home.  The brie melts in your mouth and the subtle hint of rosemary in the wine syrup somehow makes you feel – more awesome…if that’s possible.

Enjoy!

Wine & Rosemary French Toast

Ingredients
Roasted Red Grapes:
1 cup seedless red table grapes, sliced in half
1/2 teaspoon coconut oil, melted
1/2 teaspoon very finely chopped rosemary
Pinch sea salt

Wine & Rosemary Syrup:
1 cup Cabernet Sauvignon (or any red wine)
1 fresh rosemary sprig
1/3 cup maple syrup

Egg Wash:
3 eggs
1/4 cup whole milk
2 tablespoons sugar
1/2 teaspoon ground cinnamon
1/2 teaspoon vanilla extract

French toast:
6 1-inch-thick slices brioche bread
2 tablespoons butter
French brie, sliced


Directions
For the roasted grapes: Preheat the oven to 325 degrees F. In a bowl, combine the sliced grapes, coconut oil, rosemary and salt. Mix to coat the grapes evenly. Scatter the grapes on a sheet pan covered in tin foil and roast in the oven, 15 to 20 minutes. They should not be shriveled up, just plump and juicy.

For the syrup: In the meantime, in a stainless steel saucepan, add the wine and rosemary sprig. Simmer on medium-low heat until reduced by half, 15 to 20 minutes. Remove the rosemary, add the syrup, turn off the heat and let rest. (This can be done ahead of time)

For the egg wash: In a bowl or casserole dish large enough to fit the bread flatly on the surface, beat the eggs, milk, sugar, cinnamon and vanilla. Beat until all the ingredients are well combined.

For the French toast: Heat a large nonstick griddle or skillet to medium-high. Dip the bread in egg wash on both sides, allowing the egg wash to soak in but not over saturate the bread. Add the butter to the skillet and let melt. Place the bread in the skillet and let brown, about 3 minutes. Flip the bread over and place some brie on the cooked side of 1 slice of bread. Allow the cheese to soften while the second side cooks to golden brown. Turn off the heat and sandwich the 2 slices together. Cut the bread on a diagonal and plate. Top with roasted grapes and drizzle with wine syrup.

Recipes adapted from Martha Stewart & Food Network

Friday, January 23, 2015

Maple Spice Glazed Donuts

Ryan & I love donuts...but I would say Ryan is definitely even more of a donut fanatic than I am. You basically cannot leave a donut lying around without him eating it - so it's no wonder that neither of us could wait until breakfast to eat one of these magical little circles of cake. 
Now that I know how easy donuts are to make, it will be incredibly tempting to make these all the time.  However, since they are baked, and you can play with the ingredients to make them even healthier - somehow they doesn't seem as bad for you. :)  I look forward to trying different flavors of donuts and you could also certainly substitute some of the milk and butter with Greek yogurt. These spiced cake donuts are a bit reminiscent of fall flavors but still delicious any time of year.  

What's your favorite kind of donut? :) If you love donuts as much as we do - you should definitely try making them at home!

Maple Spice Glazed Donuts
Makes 6 donuts

Ingredients:

Maple Glaze 
1/4 cup unsalted butter
1/2 cup pure maple syrup
1 cup sifted confectioners' sugar
1/2 teaspoon vanilla or maple extract (optional)


Spice Donuts
1 cup white-whole wheat flour
1 teaspoon baking powder
1/4 teaspoon baking soda
1 teaspoon ground cinnamon
1/2 teaspoon ground nutmeg
1/4 teaspoon ground cloves
1/4 teaspoon salt
1 large egg
1/3 cup light brown sugar
1/2 cup almond milk
2 Tablespoons unsalted butter, melted
1 and 1/2 teaspoons vanilla extract

Directions:
Preheat the oven to 350F degrees. Spray a donut pan with non-stick spray. Set aside.
Make the glaze first: In a small saucepan over low heat, melt the butter and maple syrup together, whisking occasionally. Once the butter has melted, remove from heat and whisk in the sifted confectioners' sugar. Set glaze aside and allow to cool and thicken.

For the donuts:  Melt butter in a medium bowl.  Add vanilla, brown sugar, egg, and milk and whisk together.  Whisk in the flour, baking powder, baking soda, cinnamon, nutmeg, ground cloves, and salt into the wet ingredients. Do not over-mix. The batter will be very thick.  (You could mix the dry & wet ingredients separately but I’m a fan of just using one bowl and simplifying the process.  Who knows if I’m completely ruining them that way or not but it’s easier!)

Spoon the batter into a large Ziploc bag and snip a corner of the bag to pipe the donut batter into each donut cup of the pan, filling 2 ∕ 3 –3 ∕ 4 of the way full.  You may have to scoop some out with a spoon to even them out if it is too difficult to pipe them with the bag.

Bake for 9–10 minutes or until the edges are lightly browned. Allow to cool for about two minutes and transfer to a wire rack set on a large piece of parchment paper or on a large baking sheet.

To glaze, simply hold the donut and dip into the glaze. Place the glazed donuts back on a wire rack to let the glaze drip down.  If you want to add swirls or stripes with the remaining glaze, you can add a little food coloring and drizzle lines across the glazed donuts.  I found that this makes a lot of glaze and I may have over-glazed them so next time I will either scale the recipe down or simply use less on the donuts and save the extra for something else.

Donuts are best served immediately. Leftovers keep well covered tightly at room temperature for up to 2 days.

Recipe adapted from Sally's Baking Addiction 

Thursday, August 14, 2014

Crispy Chicken Bacon Waffle Wrap with Maple Vinaigrette

So...I think I'm going to start wrapping all my meals in waffles.  It just makes sense.  

It may sound strange...but I promise it is delicious. I know it's natural to think of a waffle as a breakfast food, but you could truly eat this meal at any time of the day!  

Also - these aren't just your regular run-of-the-mill waffles.  These are cheddar waffles. Yeah...that's right.  There is cheddar baked right into every little delicious square.  How awesome is that?  Maybe I'm the only one geeking out right now but I can't help it.  I'm totally going to start putting cheese right in my waffle mix more often.  Think of the possibilities...an egg breakfast waffle wrap? Or maybe a bacon cheeseburger with cheddar waffle instead of a bun?  Let me know if you come up with any other ideas! :) 


The maple vinaigrette adds a nice sweet touch to this savory wrap and it compliments the chicken nicely.  Even though you may be able to put anything on a waffle, maple syrup is still a waffle's best friend in my eyes.  hope you enjoy these as much as I did...no matter what time of day it is! :) 

Crispy Chicken Bacon Waffle Wrap with Maple Vinaigrette 
Serves: 2 - 4

Ingredients:

Crispy Chicken:
2 - 3 Chicken Breast
Buttermilk (enough to cover chicken, 1½ - 2 cups)
1 tsp Salt
½ tsp Pepper
1½ - 2 cups Flour
½ tsp Pepper
2 tsp Garlic Salt
1 Tbsp. Paprika
1 tsp Chili Powder

Waffles:
I make my homemade waffle mix in a big batch so I can use one cup of the dry mix whenever I want to whip up a batch and simply add the wet ingredients below.  You can see my full recipe here

1 cup dry waffle mix (or Bisquick)
1 egg
1 cup almond milk
1 teaspoon oil
1 teaspoon vanilla extract
½ teaspoon cinnamon (if desired) 
1 tsp Salt
½ tsp Pepper
½ cup shredded Cheddar Cheese

Maple Vinaigrette:
3 Tbsp. Maple Syrup
1 Tbsp. Apple Cider Vinegar (Bragg’s brand recommended)

Instructions:

For the Crispy Chicken:
In a gallon size Ziploc bag, pour in the butter milk and add 1 tsp of salt and ½ tsp pepper. (Can also add in hot sauce or chili powder if desired…which I always doJ). Seal the bag, place in the fridge for at least 4 hours or preferably overnight to marinate. Take out of fridge for at least 15-30 minutes prior to frying so it can come to room temperature.

Heat at least 2-3 inches of oil in a Dutch oven to about 375°F.  This is a TON of oil…I opted to use the lower end but that could result in you needing to cook the chicken longer and flip often if it is not full covered by the oil. 

In a Ziploc bag or shallow bowl mix together the Flour, Garlic Salt & Pepper, Paprika and Chili powder until well blended.

Place the buttermilk soaked Chicken one piece at a time into Flour mixture and generously coat all over.
Carefully place all the coated Chicken once at a time into the hot oil and deep fry for 5 - 6 minutes.

Remove, drain on a paper towel lined plate and let the chicken rest for 5 minutes.

Add the Chicken back to the hot oil once more this time for 5-10 minutes or until golden brown, remove, drain and keep warm in 300°F oven until ready to serve.  We are basically deathly afraid of under-cooked chicken, so once again – I cooked mine longer, plus the pieces I had were pretty thick.  It might be better to butterfly the breasts and separate so that they don’t take as long to cook, plus a thinner piece of chicken will fit nicely into the waffle wrap!

For the Waffles:
In a bowl, mix together homemade waffle mix, Egg, Milk, Oil, Salt & Pepper and your favorite shredded cheese. Mix well.

Heat waffle iron, spray with cooking spray, pour about ¼-½ cup or recommended amount of batter for your waffle iron, so that you don't have a spill over, close cover and cook for about 4 - 5 minutes or until just golden.

For the Dressing:
Mix Maple syrup and apple cider vinegar in small bowl and set aside until ready to use.

To Assemble:
Fold a warm large round waffle in half add 1 chicken breast, lettuce, crispy smoked bacon, tomatoes, extra cheese, and generously drizzle Maple Vinaigrette and serve with additional Vinaigrette on the side. Enjoy!


Recipe adapted from Little Figgy

Sunday, April 13, 2014

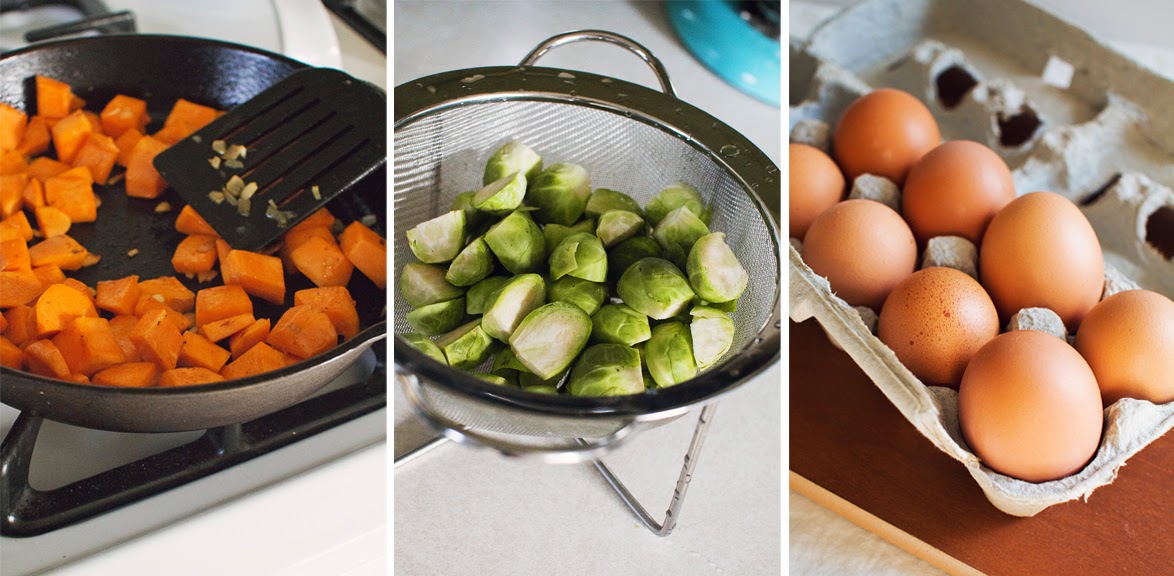
Sweet Potato Hash with Brussels Sprouts and Bacon

One of my favorite things to do is to try a new recipe based solely on what I have on hand in the kitchen.  Usually if you type in a few of the ingredients you have online, you can find almost any recipe.  Sometimes it works better than others.  Luckily, this time it worked – and the result was delicious!  This would make a great main course for a brunch with friends, a weekend breakfast – or in our case, it made for an easy weeknight dinner option!  Gotta love breakfast for dinner! 


If you’re not a fan of brussels sprouts or if you’ve never tried them – I urge you to still give this a shot.  I personally never thought I liked brussels sprouts until a few months ago but it was only because I never really tried them – and the one time I did I think it was at a restaurant and they were simply steamed and not as tasty.  Don’t knock em till you try em…especially caramelized and roasted with some shallots & bacon.  Yum. Now they are pretty much a staple veggie in our house!  

Enjoy :)

Sweet Potato Hash with Brussels Sprouts and Bacon
Serves 2

Ingredients:
4 strips bacon, cut into 1 inch pieces
1 small shallot, diced
1 small sweet potato, cut into 1/2 inch pieces
1 clove garlic, chopped            
½ pound brussels sprouts, trimmed and sliced
salt and pepper to taste
2 eggs

Directions:
Cook the bacon in a pan (preferably cast iron if you have it or non-stick) over medium heat until crisp.  Remove bacon and set aside.

Add the shallot and sweet potato to the same pan you cooked the bacon in and saute until tender, about 5-7 minutes.

Add the garlic and saute until fragrant, about a minute.

Add the brussels sprouts, saute until tender, about 5 minutes, let sit until the bottoms start to caramelize, about 5 minutes.  Mix everything, let sit for 5 minutes and mix it all up again.

Season with salt and pepper to taste.

Create 2 small wells in the hash, add the eggs and cook until the desired level of doneness.  Typically, you might see a hash topped with two fried eggs.  We prefer our eggs scrambled so I whisked them in a small bowl before adding them to the pan.   However, if you prefer a fried egg on top, you can place the pan in the oven to finish cooking the eggs and to ensure that the tops of the eggs cook fully.

Recipe adapted from Closet Cooking 


Sunday, March 30, 2014

Dark Chocolate Cherry Scones


The weather is finally getting warmer...although I'm still not sure it is here to stay. Today was actually nice enough to take a run and a couple walks outside which was so refreshing after being stuck inside during this horribly cold winter!  Hopefully you were able to get out and enjoy it too if it was warm where you are. 

Last summer I was lucky enough to receive 10 lbs. of cherries from Northwest Cherry Growers for a recipe challenge.  Despite making various recipes, eating the fresh cherries, and giving some away - we still weren't able to go through all of them so I pitted and froze some bags of cherries to use in the future.  I'm glad I did and I was able to pull out a bag from the freezer to use some for this scone recipe.  I'm looking forward to fresh fruit being in season and hopefully even warmer weather! 

Dark Chocolate Cherry Scones
Ingredients:
2 cups all-purpose flour
1/3 cup unsweetened cocoa powder
1/3 cup packed brown sugar
2 teaspoons baking powder
3/4 teaspoon baking soda
1/8 teaspoon salt
1/2 cup butter
1 beaten egg
8 ounces maple (or plain) yogurt
1/2 cup miniature semi-sweet chocolate chips
¾ cup bing cherries, pitted and chopped, juice reserved

Directions:
Combine flour, cocoa powder, brown sugar, baking powder, baking soda, and salt in a large bowl. Cut in butter. Add egg and yogurt to dry ingredients. Add chocolate chips & cherries and stir until soft.  Form scones into desired shape and size and place onto cookie sheet covered with parchment paper. Bake at 375 degrees for 10 to 12 minutes.

For the Cherry Glaze:
Use some of the juice from the chopped cherries and mix with about 1 cup of powdered sugar.  Add more milk or cherry juice until you reach the desired consistency and your glaze is smooth and drips easily off a spoon.  Drizzle the glaze over cooled scones and serve immediately.  

Recipe adapted from Virtual Cities

Sunday, February 23, 2014

Chocolate Cinnamon Sugar Scones


There's just something wonderful about baking on a day off.  It makes the whole house smell sugary & feel warm & toasty.  I love not having to rush around to be anywhere...I can just make a cup of coffee, bake something delicious, and curl up with my comfort food.  If only every day was a day off work...

Here are some pretty tasty scones.  If you like chocolate but not cinnamon, you can certainly omit the cinnamon and these would still be good - but I happen to like the hint of spice it adds and I promise it's not overpowering.

Enjoy!

Chocolate Cinnamon Sugar Scones
Makes 12

Ingredients:
2 cups all-purpose flour
1/3 cup pure cane sugar
1 1/2 teaspoon baking powder
1 teaspoon cinnamon
1/2 teaspoon baking soda
1/2 teaspoon salt
1/8-1/4 tsp lemon zest
1/2 cup cold butter, cut into small cubes
3/4 cup dark chocolate chips
2/3 cup almond milk + ¼ cup for brushing the top of scones
Cinnamon-sugar for sprinkling on top of scones

Directions:
1.Preheat oven to 350˚F.

2. In a large bowl, sift together the flour, sugar, baking powder, cinnamon, baking soda, salt and lemon zest.

3. Cut the cold cubes of butter into the flour mixture and mix with a pastry blender until the butter is completely incorporated and the mixture has obtained a fine texture.

4. Add the chocolate chips and gently mix together.

5. Fold in the almond milk and mix together until just combined and the mixture has formed into dough.

6. Form the dough into a 9”x 9” square about 3/4 inch thick and cut into 12 pieces. Transfer scones onto a parchment lined baking sheet.

7. Brush the tops of each scone with a small amount of milk and sprinkle with cinnamon-sugar.  Bake for about 15 to 20 minutes or until the scones puff up and the tops just start to brown.


8. Serve warm and store extras (if they last that long!) in a sealed container or freeze to serve at a later date.  

Recipe adapted from Spoon Fork Bacon

Sunday, February 16, 2014

Blackberry Coffee Cake


Anytime we visit Ryan's parents, there is bound to be a lot of good food there.  Usually we eat enough in one weekend that we shouldn't need to eat for a week...but then they send us home with even more food and it doesn't stop. :) One of my favorite recipes that my mother-in-law makes for us is this blackberry coffee cake.  I was almost scared to try to make it myself because I didn't want to ruin it - she makes it so well! 

It feels a little bit like eating dessert for breakfast....which I'm completely okay with. But it does have fruit in it - so that makes it healthy, right?  The other great thing is that these blackberries were hand picked by my mother-in-law!  She picks a ton of berries in the summer and then packages them up and freezes them...and she is kind enough to share the wealth.  So, thank you to my mother-in-law for the berries and this recipe!


Blackberry Coffee Cake                      
Makes 2, 9-inch coffee cakes

Dough
1 pkg yeast (2 1/4 tsp)
1/2 c. warm water (105- 115 degrees)
1/2 c. lukewarm milk
1/3 c. sugar
1/3 c. butter softened
1 tsp salt
1 egg
3 1/2-4 c. bread flour

Dissolve yeast in warm water. If using bread machine, add ingredients directly to bread pan in order listed and mix on “dough” setting.

If not using bread machine:  Stir dissolved yeast with milk, sugar, butter, salt, egg and 2 c. flour.  Mix in remaining flour.  Knead dough until smooth and elastic, about 5 min.  Place in greased bowl, turn greased side up.  Cover and let rise in warm place until double - about 1 1/2 hours.  Dough is ready when indentation remains when touched.  

While dough is rising, prepare the berry filling and cream cheese filling.  The berries should be mostly cooled before adding them in the cakes.   

When the dough is done rising, divide dough in 1/2 and roll each half into 15" circle.  Fold into 1/4's and place in two 9" greased round pans.  Point of dough should be in center of pan.  Unfold, press dough against sides, allowing edge of dough to hang over pan (approx. 2" or so)  Spread 1/2 of cream cheese mixture in each pan and top with berry mixture, Make cuts in dough, 1" apart around the outside edge of dough...to pan.   Twist opposite strips and meet in the middle and press together to seal.

Beat egg white until foamy and brush over dough.  Cover and let rise in warm place 45 minutes. Cover pans loosely with foil and bake at 325 degrees for 30-35 minutes. If middle still seems doughy, bake for a few extra minutes, checking often.

Berry filling:
4 c. blackberries
1/2 c. sugar
3 Tbsp cornstarch

Directions: 
Mix cornstarch with sugar and then cook with berries until thick

Cream cheese filling:
8 oz cream cheese
1/4 c. sugar
3 Tbsp flour
1 egg yolk

Directions: 
Mix ingredients until smooth. 

Frosting:  
(makes enough for both coffee cakes – if only serving one and freezing the other, cut the frosting recipe in half and frost right before serving)
3 cups powdered sugar
1/3 cup butter, softened
1 ½ teaspoons vanilla extract
1 to 2 tablespoons milk

Directions:
In medium bowl, mix powdered sugar and butter with spoon or electric mixer on low speed. Stir in vanilla and 1 tablespoon of the milk.

Gradually beat in just enough remaining milk to make frosting smooth and spreadable. If frosting is too thick, beat in more milk, a few drops at a time. If frosting becomes too thin, beat in a small amount of powdered sugar.

Friday, August 09, 2013

Drunken Cherry Waffles {and a giveaway!}

Everyone knows that eating breakfast does a body good.  Everyone also knows that eating fresh fruit does a body good.  What some people don't realize, is that eating fresh fruit that has been soaked in a liqueur and cooked into a caramelized state - then poured onto pretty much anything, makes breakfast even better. 
I do want to clear the air and note that despite the name of this drunken cherry waffle recipe, these waffles won't get you drunk.  Unless of course you consider yourself to be drunk with happiness after realizing how delicious they are.  
(my husband is the lovely hand-model-syrup-pourer-taste-tester pictured above) 
Pitting cherries can be hard work....but luckily OXO came to my rescue with the help of their handy dandy Cherry Pitter that they sent me along with 10 lbs. of cherries from Northwest Cherry Growers for participating in this blogging challenge! Thank you OXO & Northwest Cherries!  I feel so lucky - especially since cherries are one of my favorite fruits and they can be expensive to purchase in the store. :) 

For this 10 lb. Cherry Challenge that I am participating in, OXO will be posting all participants' posts in a photo album on their OXO Facebook page on Monday, August 12th for fans to vote via "likes."  The post with the most "likes" wins some pretty *sweet* OXO products and will be a featured Facebook post the following week! 

So - I need YOUR help!  Please help me win this 10 lb. Cherry Challenge by visiting OXO's Facebook Page next week and "liking" my photo & recipe!  In exchange for your help, you can enter to win my giveaway! The lucky reader will receive a brand new OXO Cherry & Olive Pitter!
  
THE GIVEAWAY
There are multiple ways to win!  Make sure to check them out below:

1) "Like" my photo on the OXO Facebook Page for the #10lbcherrychallenge 
2)Leave a comment on this blog 
3) Like my Facebook page (if you haven't already) and leave a comment on the Facebook page!
4) Follow me on Twitter and leave a comment on this blog that you are a follower 
5) Follow me on Pinterest and leave a comment on this blog that you are a follower
6) Post about this giveaway and recipe on your blog or Facebook page and link it back to me!

You will be entered once for each method you choose!  Winners will be selected randomly (using a lifeless random number generator) and announced the week of August 19th.  I will ship the cherry pitter to the winner for free within the U.S.

Good luck! 

Here is the box of premium cherries that arrived on my doorstep!

Here is OXO's Cherry Pitter being put to good use!

And last but not least...here is the recipe for the delicious drunken cherry waffles:

Drunken Cherry Waffles
Serves 2-4
Homemade Waffle Mix: 
Dry ingredients (makes enough for multiple uses – use within 3 months)
4 cups all-purpose flour
3 tablespoons baking powder
2 teaspoons baking soda
1 teaspoon salt
3 tablespoons sugar

Directions
Combine all ingredients in a bowl. Pour and store in an air-tight container.

To make waffles:
Ingredients
1 cup dry pancake mix (from above)
1 egg
1 cup milk
1 teaspoon light olive oil
1 teaspoon vanilla extract
1 teaspoon cinnamon
½ teaspoon lemon zest

Directions
In a bowl, combine dry pancake mix, egg, milk, oil, vanilla extract, cinnamon and lemon zest.   Mix just until combined.  Heat waffle iron and lightly grease with butter or cooking spray. Pour batter on waffle iron. Cook until lightly brown and crispy.  Top with drunken cherries and maple syrup.

Drunken Cherries
Ingredients
1 ½ cups pitted whole sweet cherries
About 1 cup Amaretto Liqueur (plus 2 TBS. more for cooking)
1 Tbs. unsalted butter
1 Tbs. sugar

Directions

Pit cherries and place in a mason jar.  Fill jar with amaretto liqueur and seal tightly.  Place jar in refrigerator and let cherries soak for 1-2 nights (or as desired).  After cherries have soaked, remove cherries from the amaretto and set aside (do not toss the amaretto!).  Chop or mash cherries in a small bowl.  Over medium-high heat, melt the butter. Add the cherries and cook, gently turning them occasionally, 2 to 3 minutes. Sprinkle in the sugar and cook until it melts, about 1 minute. Gently stir in the 2 TBS. amaretto and cook until the liquid has reduced slightly, about 1 minute.  Serve waffles immediately and top with a spoonful of the drunken cherries & maple syrup. 

Check out some of the other great cherry recipes from the other bloggers that participated in this 10 lb. Cherry Challenge!
3.    noblepig.com
8.    diethood.com/